Hello All, I would like to thank you for showing your interest on my blog. I have received couple of emails from the readers regarding the cloud drive setup & linking it to their mobile apps.
Here is the complete procedure for creating a Cloud Drive completely free of cost for a whole year without spending a single rupee. Before starting to the process, i would like to list out the minimum requirement to get it done.'
Here is the complete procedure for creating a Cloud Drive completely free of cost for a whole year without spending a single rupee. Before starting to the process, i would like to list out the minimum requirement to get it done.'
1. Very minimal knowledge on setting up google cloud account.
2. Minimal knowledge on setting up Cloud VM.
2. Minimal knowledge on setting up Cloud VM.
3. A working credit card to attach to your billing account (It wont charge your card unless you utilize the resource more than require and higher limit cap) Please note that, i wont be responsible for any deduction if any wrong option selected, so please read the Google cloud terms & conditions carefully before starting.
First of all let me tell you what we are going to do.
1. We are going to use Google's Cloud Infrastructure as Free tier for one year (with $300 free credit from Google)
2. We are going to create a VM using Bitnami's Own-cloud stack single-tier. (https://google.bitnami.com/launch/owncloud)
How to get Free $300 Credit from Google?
1. Browse and login to https://cloud.google.com/free/ and login using your email account and password. The following screen will popup.
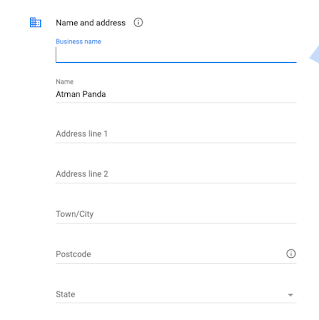
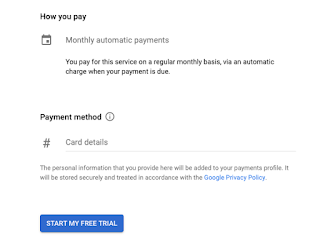
2. Click on "Agree And Continue" then you have to add your personal details along with payment method & then click on "start my Free trial"

2. How to create the Own-cloud VM?
a. Once you have the Free trial account ready, follow the below link.
https://bitnami.com/stack/owncloud/cloud and click on single tier.
b. Click on Launch OwnCloud (Google) if you have AWS account you can proceed with amazon too.
After selecting the Google cloud option, it will ask you to authorize to allow Bitnami some permmissions. You can read all the terms conditions and the privacy policy so that you know every details of what you are sharing to bitnami. If there is something you dont like, just abort from here. Any way you already have $300 to do what ever you want to host on the Google cloud.
Once you are giving authorization, bitnami will be able to create VM on Google cloud on your behalf and it will be much easier for you to handle if you very new to the Google cloud platform and its services.
Bitnami ownCloud Stack Single-Tier
- Bitnami Cloud Images extend stack appliances to run in a cloud computing environment.
You can run Bitnami applications on a pay-as-you-go basis, programmatically starting
and stopping them.
Bitnami ownCloud Stack
is pre-configured and ready-to-use immediately on
any of the platforms below.
-
- Quickly deploy your applications to the cloud and make them available online
- Only pay for the resources you use.
- You will have complete control on the configuration of your server through.
Now, you are ready to deploy your VM and get started.
1. Add a Name like "my-own-cloud-server" (All small letters)
2. Select Disk type "Solid state" for better performance, I have selected Magnetic as its bit cheaper and i m using only for training purposes.
3. Make the Disk size to 100 GB, you can make it lower or Higher based on your need.
4. You can Drag right to have a bigger server size, but if you are making it for your private use, keep it smaller as cost effective.
5. Right side in Region map, select your nearest region for better performance.
6. Finall preview all the options, approx. price per month & then click on Create.
On clicking create, Bitnami launch pad will start creating your server & auto generate all your credentials. On left side you will be able to see the user name and password. Here, you can see in below image, the user name is "user" and password is secured, if you click on show, you can see the password.
1. Save the password some where in your local machine
2. Save the PEM & PPK files (right side) also to your local system which may need in future when you will become and advanced GCP user.
And allow bitnami to process for 4 to 5 minutes and your server will be ready & launched. You will see more option to start/stop/reboot your server once its ready.
Hurrah!!! Done, have a good breadth, Your Own cloud system is ready. Now,
you can browse your cloud drive using the IP address given right side. I
have masked it for security purpose. And after that, you can see the
drive similar to Google drive or Dropbox, having some sample documents.
You can drag and drop your local files to it & Enjoy!!!
Thats all!!! Thank you for reading & trying!!!


